How to Remove a Glued on Backsplash
Easily remove a glued on backsplash with our step by step photos and tips! Updating a dated kitchen is easier than you might think, follow along as we remodel our farmhouse!
Removing Glued on Backsplash
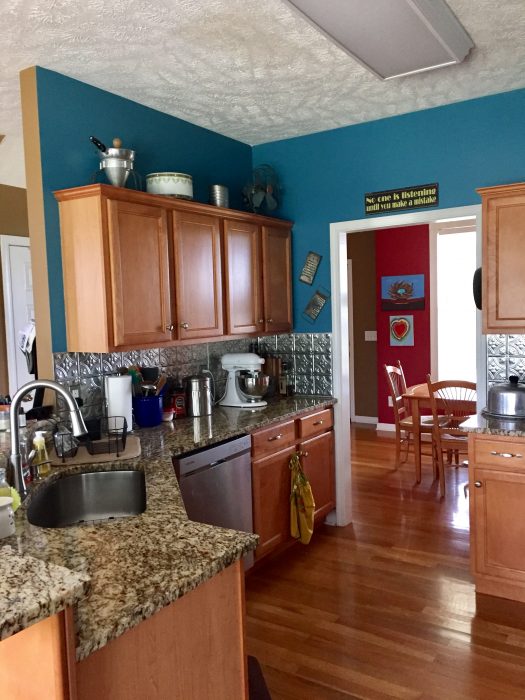
My least favorite part of home projects is the “undoing.” I hate trying to figure out the best way to undo what someone else did. In our $750 Kitchen remodel (full post coming soon!) the worst part was removing the glued on metal backsplash the previous owners had installed. The backsplash had been installed with what we are pretty sure was liquid nails. It didn’t matter how much we tugged, it wouldn’t budge. This is what the kitchen looked like right before we moved in:
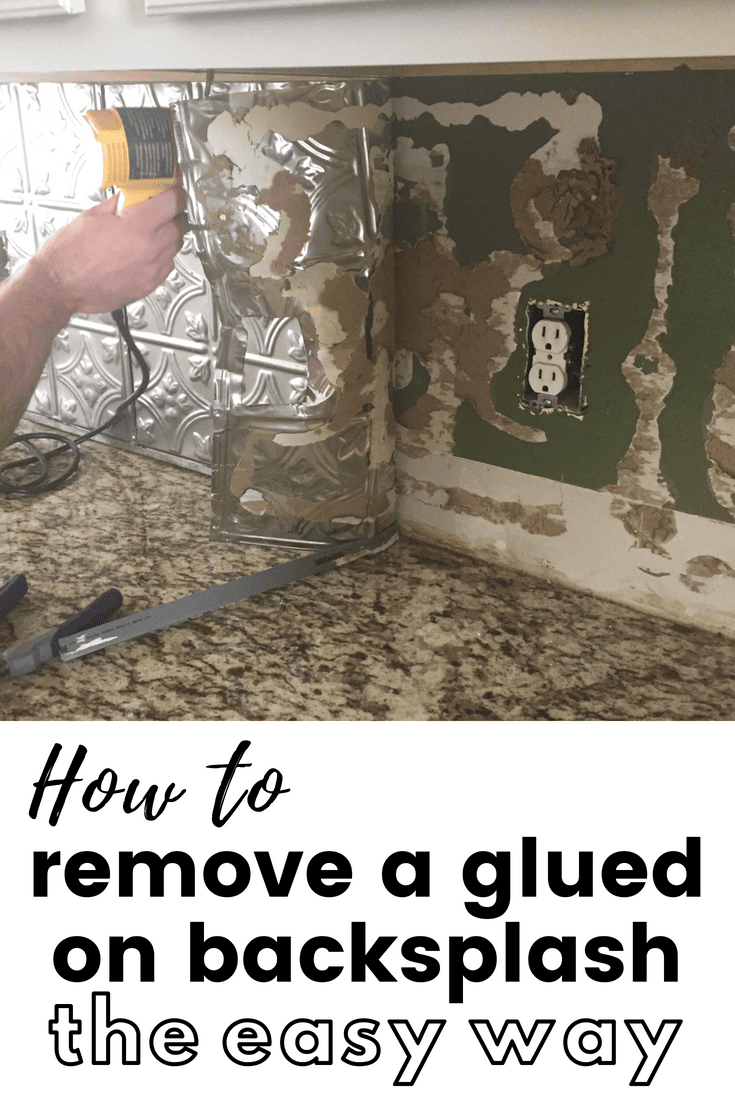
- The answer to our problem was an inexpensive heat gun. This baby was a game changer. Here are my best tips for removing a glued on backsplash
- Begin by removing all the outlet overs. Take a box cutter, or other sharp razor blade and score along the outlet covers and along the bottom, top and sides. In our case the edges were glued really well and they had painted the kitchen at some point so the paint was dried along all of the edges. Scoring the sides created an opportunity for us to create a little leverage. If you still can’t get any leverage try using a small tool, like a paint can opener to pry the backsplash from the wall.
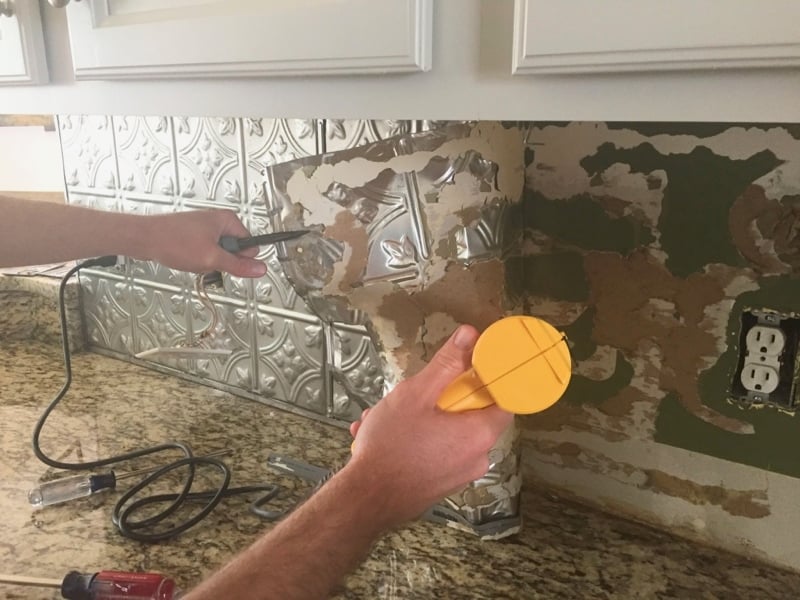
- Once the edges are a little loose find a good starting spot and pull it loose with needle nose pliers. Don’t use your hands, the edges of this metal backsplash are very sharp.
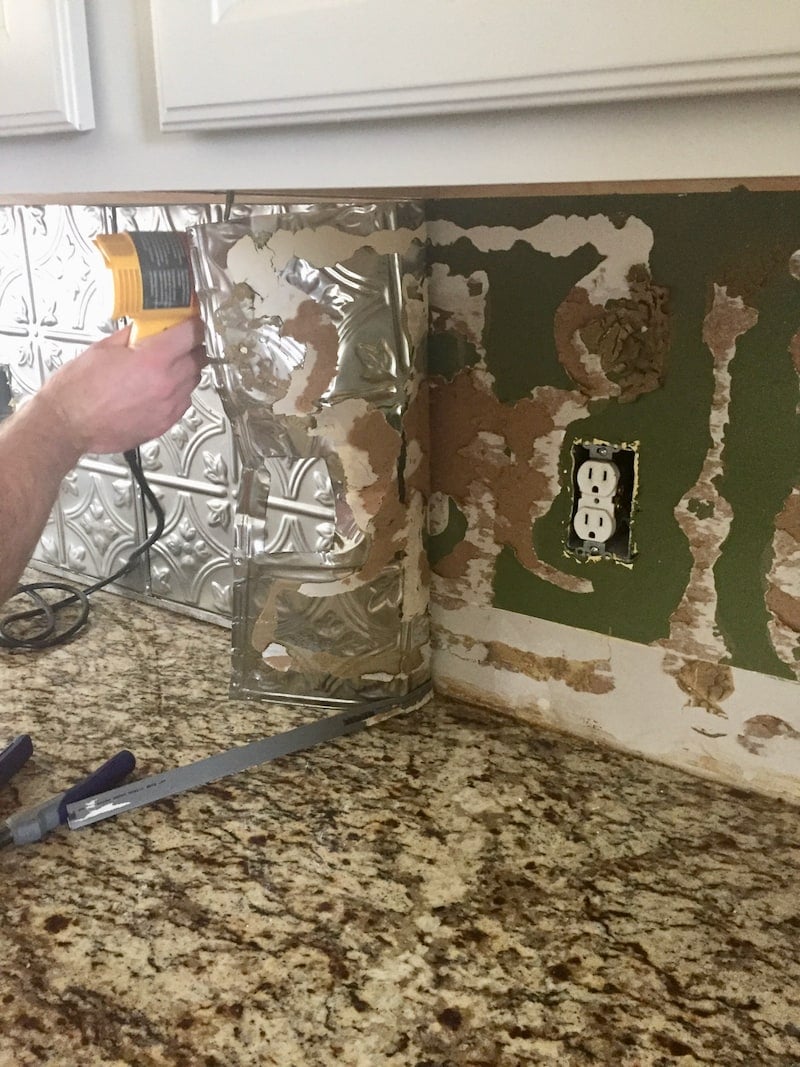
- Using the heat gun slowly move it back and forth over the metal backsplash with one hand while you slowly pull back the metal with the pliers in the other hand. Tip: Some of the areas of ours were so heavily glued it took two people, one to hold the heat gun and the other to pull the metal back with both hands (two set of pliers, one at the top and one at the bottom)
- If you find that you need to give some trouble areas a little extra attention you can use a metal scraper (not plastic because of the heat gun) to help get past heavily glued areas.
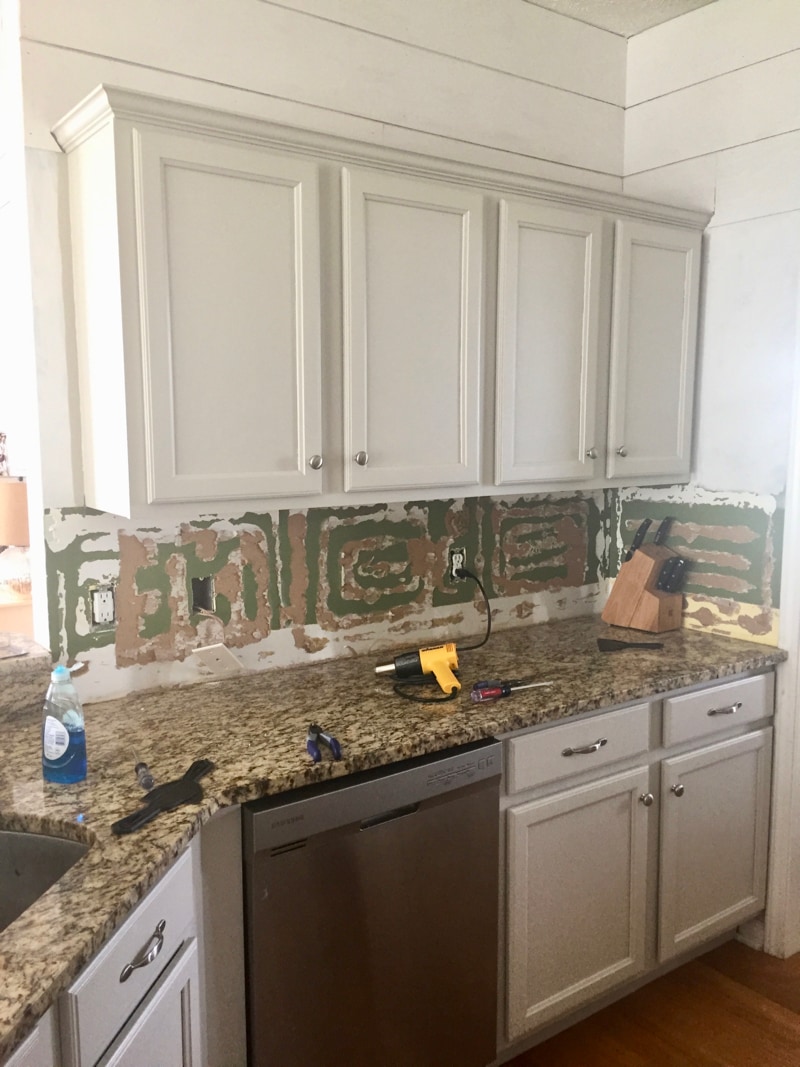
Preparing your wall
Odds are once the glued on backsplash has been removed your wall will be a mess. We were preparing for our DIY Brick Backsplash so I used pliers to pull any big glue clumps I could off the wall. A box cutter was also helpful in a few areas, I literally cut the dried glue patches off the wall. Once you have as much of the glue chunks off the wall as possible grab a palm sander or a block of sandpaper and try to get the wall as smooth as possible. Keep a shopvac handy because this will be a huge mess.
What’s Next
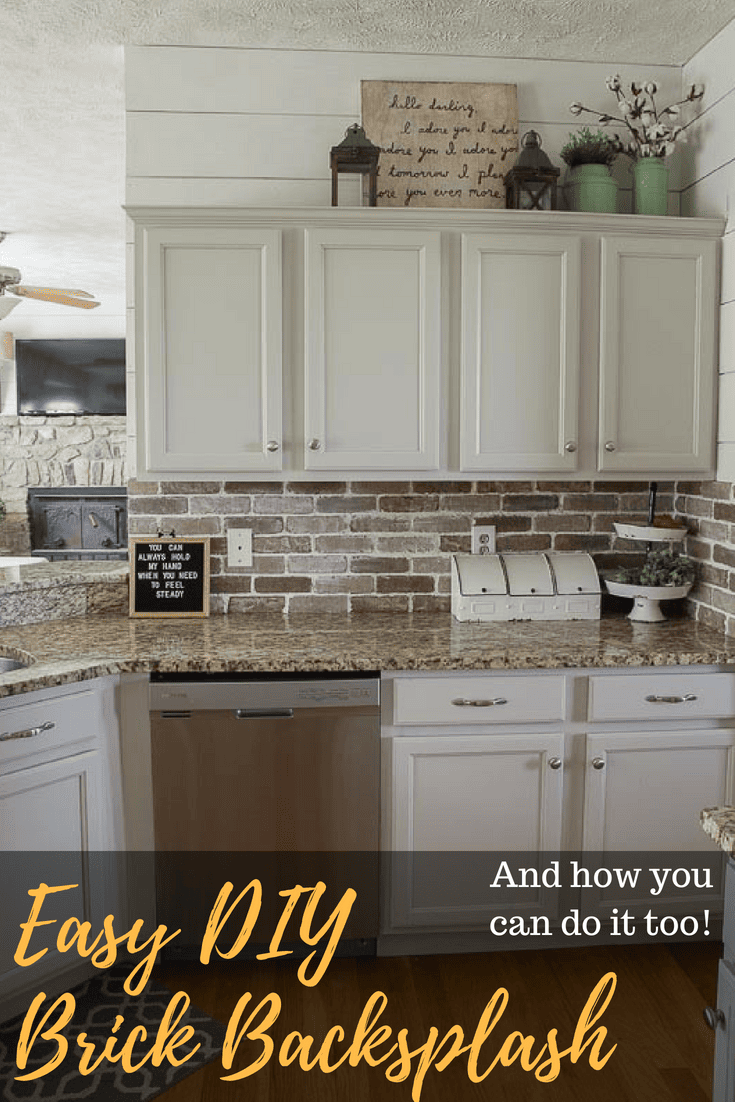
With a fresh slate you can do anything you want! We opted for brick, which I am so in love with. It was easy, affordable and a great beginner project. I also love that if you ever get tired of the brick you can white wash it or paint it to create a new look without having to install something new.